MyViz
3Sigma développe l'environnement logiciel MyViz et l'utilise pour faciliter l'exploitation de ses propres systèmes didactiques ou ceux de certains partenaires.
Les fonctionnalités de MyViz sont les suivantes:
- Visualisation en temps-réel des signaux acquis sur les systèmes
- Pilotage interactif, par table de points ou par programme (Python ou G-code) du système, quelque soit son mode de connexion (liaison série, Ethernet,...)
MyViz intègre en plus les composants suivants:
-
Distribution WinPython 3.7
- Permet d'exécuter des scripts Python depuis l'interface graphique
- Tous le modules additionnels nécessaires sont déjà installés pour faciliter la vie des utilisateurs
-
Logiciel de tracé graphique "offline"
- Analyses avancées sur les signaux qui viennent d'être acquis
- Rechargement et superposition éventuelle de signaux déjà enregistrés
- Logiciel de conception de diagrammes d'états (pour concevoir des machines à états finis)
- Visualisation 3D temps-réel pour les systèmes intégrant un modèle de simulation
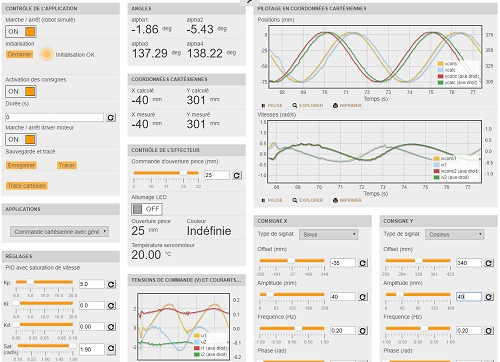
Voici une liste non exhaustive des différents composants graphiques de MyViz utilisés sur nos systèmes:
Acquisition et visualisation temps-réel
Ces affichages textuels ou graphiques sont utilisés sur tous nos systèmes:
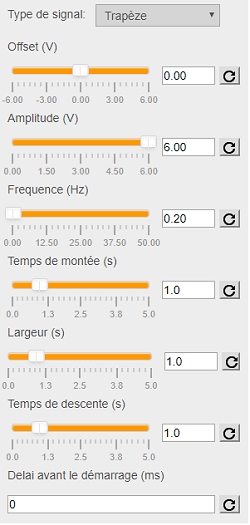
Générateur de signal interactif
Ce composant permet de choisir un type de signal (échelon, sinus, trapèze, triangle, rampe ou formule) et de le paramétrer:
Curseur de réglage temps-réel
La modification des curseurs peut être prise en compte immédiatement par le système piloté:

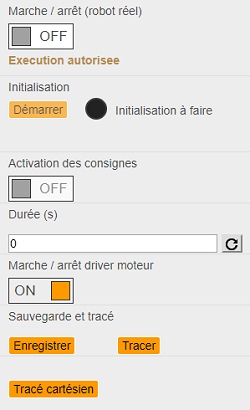
Interrupteurs, boutons, indicateurs de changement d'état
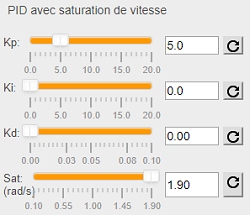
Réglage temps-réel de PID
La prise en compte des modifications peut se faire immédiatement par le système piloté, même pendant son fonctionnement:
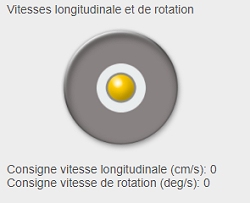
Joystick virtuel
Ce composant est idéal pour piloter un robot mobile (comme T-Quad, Geeros ou X-Bot):
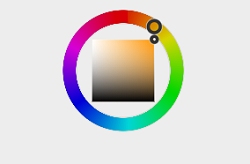
Roue des couleurs
Ce composant est très pratique pour les applications de reconnaissance de couleur (comme sur les systèmes Slider Cam et T-Quad):
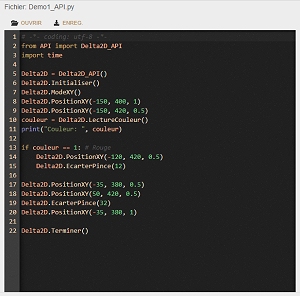
Editeur Python
Il permet d'avoir en parallèle dans le tableau de bord le code Python et les courbes de télémétrie (utilisé en autres sur le Delta2D):
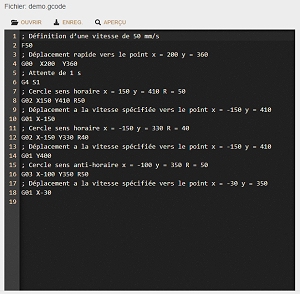
Editeur G-code
Même principe que l'éditeur Python mais avec le langage G-code (utilisé sur le Delta2D):
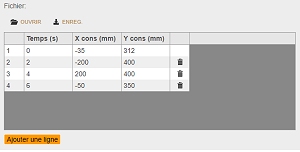
Editeur de tables de points pour spécifier des trajectoires
Il est utilisé sur nos robots manipulateurs (Delta2D, DeltaBot):
Editeur de formules mathématiques
Ce composant apporte plus de souplesse que le générateur de signal (Il est utilisé entre autres sur le Delta2D et sur la plateforme 6 axes):

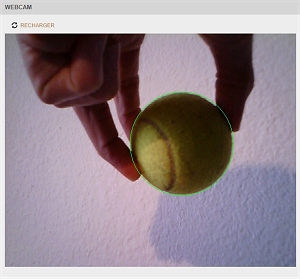
Affichage de vidéo provenant de Webcams
Idéal pour la téléopération ou les systèmes intégrant du traitement d'image (DeltaBot, Slider Cam, T-Quad, Geeros):
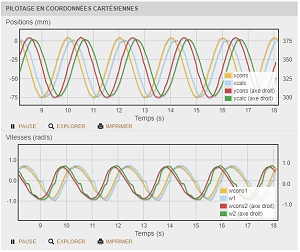
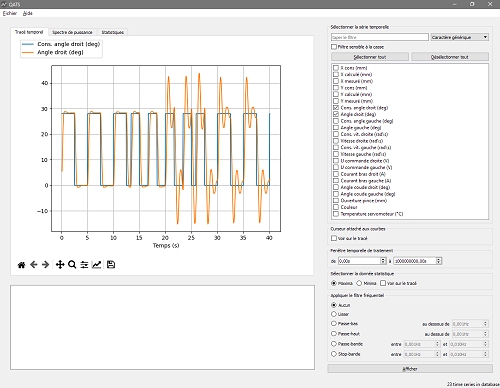
Application de tracés graphiques
Cette application est intégrée à MyViz pour visualiser les résultats de la dernière acquisition ou pour recharger tout type de série temporelle sauvegardée sous forme de fichier CSV:
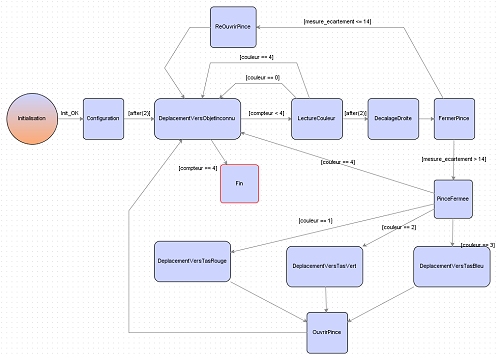
Logiciel de conception de diagrammes d'états
Il permet de concevoir des machines à états finis de façon graphique et de visualiser les états et transitions actifs pendant le fonctionnement. Il est utilisé sur les robots Delta2D et T-Quad:
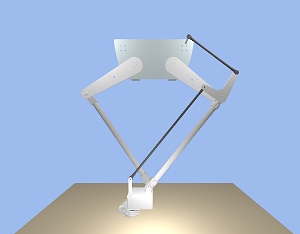
Visualisation 3D temps-réel
Certains systèmes (comme le Delta2D) incluent un simulateur temps-réel permettant de comparer les écarts entre la réalité et un modèle dynamique. Afin d'avoir le maximum de réalisme, une visualisation 3D avec animation est affichée pendant l'exécution:
Captures d'écran et vidéos
Vous pouvez voir MyViz en action sur les captures d'écran ou vidéos de présentation des systèmes suivants:
Téléchargement
Vous pouvez télécharger MyViz ici:
https://www.3sigma.fr/myviz/MyViz.zip
https://www.3sigma.fr/myviz/MyViz.7z (fichier moins gros, se décompresse avec 7-Zip).
Dans tous les cas, nous vous conseillons d'utiliser 7-Zip (https://www.7-zip.fr) pour la décompression, ce logiciel étant beaucoup plus efficace que celui intégré à Windows.
Utilisation
L'archive que vous pouvez télécharger ci-dessus est "portable": il n'y a pas d'installeur, il suffit de décompresser le .zip dans le répertoire de votre choix. Nous vous recommandons cependant de le faire à la racine d'un disque (comme C:) car Windows présente une limite sur la longueur des chemins.
Le lancement de l'application se fait ensuite en double-cliquant sur l'exécutable "MyViz.exe" qui se trouve tout en haut de l'arborescence du logiciel.
Notez que par défaut, la version de MyViz que vous pouvez télécharger avec le lien ci-dessus ne permet pas de modifier les tableaux de bord, pour éviter toute modification intempestive par les élèves. Si vous êtes enseignant, vous pouvez nous contacter à l'adresse info@3sigma.fr pour que nous vous indiquions la procédure de déverrouilage.
Tutoriel
Vous pouvez télécharger ci-dessous un tutoriel permettant d'échanger des données de façon bi-directionnelle entre MyViz et une carte de type Arduino via le port série:
https://www.3sigma.fr/myviz/tutoriels/Tutoriel_PortSerie_1.zip